


Remember those old-school video games? Who doesn't love the nostalgia of firing up a classic retro gaming console? But bringing back those classic gaming vibes is certainly not a walk in the park. From the initial component selection to final product realization, each step is a thorough process of sifting through datasheets, juggling compatibility concerns, and mitigating the risk of design errors. That’s where CELUS comes into play, your ultimate circuit design superpower that frees you from those tedious tasks.
CELUS is here to upgrade the way we design electronics. It simplifies the whole process, making it easy and intuitive. By handling the draining, repetitive tasks like picking components and creating schematics, CELUS lets you unleash your creativity – no more datasheet nightmares. It's not just about saving time; it's about empowering designers to innovate freely.
Thanks to CELUS's design automation, your gaming console design process is boosted. You no longer just pick any microcontroller; CELUS finds the perfect, most suitable component to level up your design game!
Navigating the CELUS Workflow
With CELUS, the path from idea to prototype is demystified. Here’s how it unfolds:
1. Project Initiation:
Log in to CELUS and create a new project, describing your vision in the Project Summary section. Here you can articulate the goals, desired functionalities, operating conditions, regulatory compliance, and budget. This clarity of intention lays the groundwork for the design execution and helps you frame your idea better.
.png?width=2559&height=1319&name=Screenshot%202024-02-13%20at%2012.58.48%20(1).png)
2. Project Information:
The next phase is defining the project's identity and scope. You name your project and specify functionalities, applications, target CAD tools, and BOM format. You can also provide a forecast of production volumes and set a timeline, painting a comprehensive picture of your project's scale. Importantly, the selection of applications for the project at this stage determines the matching templates that will be offered later, ensuring a tailored approach to project development.

3. Project Specification:
In this step, preferences take center stage. You specify any part or manufacturer preferences, define power budgets, and set compliance and temperature parameters. It is important to note, that choosing specific manufacturers impacts the outcomes of CUBO selections in the design process.

4. Template Selection or Custom Creation:
CELUS Design Studio then presents a list of matching templates rated by their fit to the applications and manufacturers entered. If existing templates don’t help jump-start the design, you can begin from scratch, designing a hardware architecture in the Canvas using drag-and-drop functional blocks.

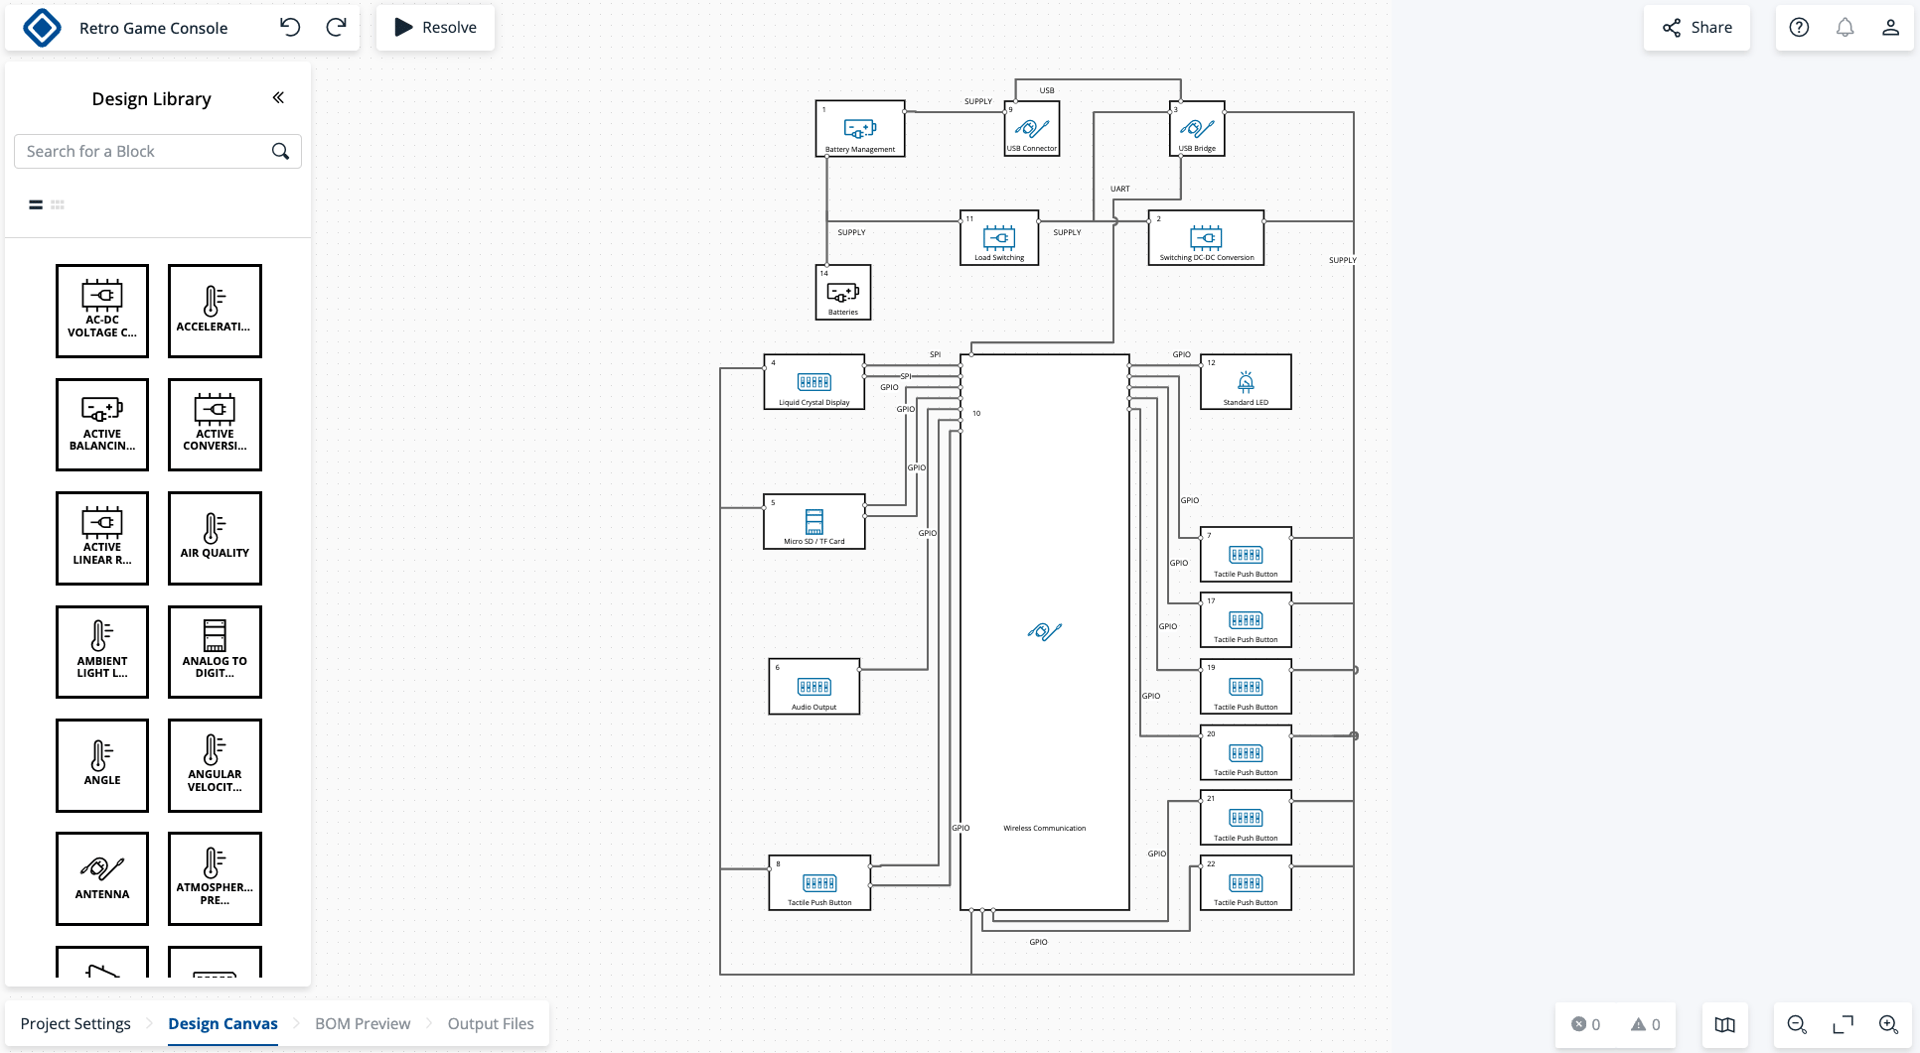
5. Capturing the Hardware Architecture:
Time to capture the technical requirements! Functional blocks from the panel on the left side of the screen are added, then connections between the blocks are established, and specifications are determined (if the user already knows this level of detail). Finally, the resolve button is pressed, and in this way, the proposed solutions by the platform (CUBOs) are displayed for the user to choose.

6. Deep Dive into CUBO Solutions:
Within each functional block, the CUBO view reveals the list of potential solutions. Users can lock in their preferred options, delve into detailed BoMs, ports, and specs, and ensure that each component is the perfect piece of the puzzle.

7. Finalization and Review:
With CUBOs selected and connections established, a final solve generates the complete project. The platform then lets you review the comprehensive BoM or the detailed PDF in Output Files, ensuring the design meets your standards.


8. Handover to EDA:
If the design checks out, it’s time for the handover. Export the project to the EDA tool of your choice (Altium Designer, Autodesk Eagle or KiCAD), ready to move from a digital blueprint to a tangible, functional prototype.


Conclusion: The CELUS Remedy
Electronic design can be tough—full of complexity, tight deadlines, and constant risks. But here comes CELUS to smoothen your ride, speeding up your journey from idea to prototype. With CELUS, the once daunting task of managing design complexities becomes a breeze. It's more than just a tool—it's a game-changer, making design headaches disappear and letting creators focus on what really counts: bringing their visions to life quickly and accurately.
Can’t wait to get your hands on the CELUS Design Platform? Sign up to our waitlist to stay up to date about our launch.


